Wednesday 20 March 2013

new armature finished


i have now finished the armature for "Charlotte". i have made this one a bit shorter than the armature for "Craig" as she will be younger and it was a kind of test to see how small i could make them, i think i could go a lot smaller and thinner.  
here is a new design of how "Charlotte" will look.


 i thought i would share how i attach my puppets to the surface of where i am animating them. these pics are of the new armature ready for sculpting, but the magnet is so strong it will work through the flooring and attract the steel toe. 


magnetic eyes

i have now received the steel ball bearings so i could get underway with the eyes and stop them from falling out when i remove the lower half of the face.


 the ring magnets, they came in a pack of ten.

first of all i made a mould of the two new bearings, each with a small stick glued to them, this will make the pour hole. this mould will ensure i have an exact replica of the bearings when it comes to moulding them.


after cutting a bearing in half i placed one half in the bottom of the mould and poured liquid plastic into the hole that the stick made. this is what came out, half a bearing capped with plastic.

i remoulded the silicone eye socket and cast it in plastic, this allowed me to drill out a section just big enough to push the ring magnets into.


the eyes sit nicely on top of the magnets.  


i just need to drill into the plastic bit and paint a iris/pupil and the eyes will be done.


Tuesday 19 March 2013

a new test

i have finally got round to testing my finished-ish puppet. here is a little clip i put together.


Friday 15 March 2013

seams to be done!

ok so i have finally got round to clothing 'Craig'. i did have a bit of a problem with finding the right kind of denim for the jeans. in the end i went to George in Asda and bought some really cheap kids jeggings that are more cotton and have a lot of elasticity. once the jeans were on i carried on with the t-shirt. unfortunately i had a little problem in, i didnt give the tee enough material to get around his belly!


i gave it a little trim, he looks like a guns and roses fan here.

i thought, this mistake is not all that bad really. my sewing skills have got much better so i thought i would jazz up his look and add another colour to his tee.


at this stage i am really happy with the way hes looking, i have been thinking about his eyes and how they're going to stay in the sockets when i remove the mouth section. i have a few bits on order so i will post my process when they arrive.
things are coming along nicely, the other armature is nearly done, possible finished by end of sunday, so i will be able to sculpt that. once again i have been thinking about designs so things will change regarding 'Craig's' sister 'Charlotte'.


Friday 1 March 2013

we'll call it a practice

i was not feeling the other t-shirt, i thought black was not the colour to go with as the rest of the film will be lovely bright colours. instead i have gone for a red and white long sleeve t-shirt. i found it much easier to do this time, i guess you could call the other tee a practice and refining of my skills, this took me from the afternoon to the evening to make so not quite as long as before.

so again i started off by cutting the shape for the body and cutting out the neck hole. i then sewed a red trim around the neck and hemmed up the bottom of the white tee. it was a lot easier to sew this material because its a really good quality, old Fat Face uniform becoming handy.


it fits!


after hemming the sleeves by the wrist i then started sewing them on. at this stage everything is being sewed inside out to create a nice smooth seam. 


check the sleeves have enough length.


this is where it starts to get rather fiddley, you need to sew a seam joining the two half's together, making sure its neat. i suggest practicing this part first otherwise it could be a waste of time and materials if you have to keep redoing it.


the finished seam, in the picture it looks quite big, i think thats due to the light.


so one sleeve done, you can't even see the seam from the front and it does not restrict the puppet in anyway. i very happy with how its turned out, i will try get the other sleeve finished along with the body tomorrow. then i need to make some jeans for him!!


Wednesday 20 February 2013

another cast!


last night i finished off the hand armatures and trimmed the wire fingers down to size and cut the excess off the bolt. im feeling confident about these hands, if it means i dont have to keep changing them i will be very happy, hope they animate well too.


once i had both hands ready i sandwiched each one between two pieces of memory foam and cut away at the foam until the hands sat nicely inside the mould. before i submerged the arms in silicone i removed the puppet and applied a thin layer of silicone inside both half's of the mould where the arms are. once this was dry i popped the puppet back in a applied more silicone and clamped down the two half's. 


more to come soon.

Monday 18 February 2013

mix post, clothes and hands

the other day i started making the clothes for my boy puppet. i started by cutting the shapes for the body using this surgical sponge wrap. its quite good to drape over the puppet as it kind of sticks to its self and the surface of the puppet.


after cutting the material out using the template i started sewing the two half's together on the shoulders, i used a mattress seam stitch. this stitch pulls the two half's together instead of over-lapping the two half's creating an invisible seam.


but.............. before i could finish the clothes i noticed the wrists to the wire hands had yet again broken! so, i got fed up with unreliable wire hands and made these ball joint hands with wire fingers. i don't mind having wire for the fingers as they don't go through quite as much abuse.

i have wrapped some cotton around the two pieces of wire and glued the wire on one side of the plates using araldite the cotton helps the araldite bond to both the wire and the plate.


i quickly remade the hands because i realised the thumb was to high up the hand and looked more like another finger, i have glued the wire on as before but split it so one strand goes further down towards the wrist.


heres a quick pic of the puppet now with painted face, teeth and hair.


Tuesday 12 February 2013

new test

today i thought i would do a quick test of my newly cast armature. i wanted to make sure the limbs would hold their own against the silicone and keep the positions i put them in.


i will try take the green screen out and remove the rig later, ill upload it when i do.

Monday 11 February 2013

new cast

i finally got around to casting my armature. before i put the armature in the mould i padded it out with memory foam to fill some the the space in the mould, this will save on silicone and make the puppet more flexible. i also covered the joints in plumbers tape to stop the joints getting clogged. 


one thing i did notice is the silicone is a completely different colour, also the theory of the padding helping to make the puppet more flexible didn't really work. i think i need to pad it out a bit more, it doesn't have the movement i was hoping for. i have actually resprayed the faces and ordered a new spray so i hope it will match up.


Thursday 31 January 2013

progress

today i have managed to do a bit more work on the new armature. i have made the feet and chest plate. there are a few areas that need to be smoothed and sanded down but apart from that, its coming along nicely.


also, my plastic arrived yesterday so this morning i finished off the mould that has been sat on my desk for weeks. i gave it a couple of hours to properly set but it actually worked which is brilliant. i need to clean it up then i can pop out a cast, probably do that on sunday.


Wednesday 30 January 2013

i forgot!

i forgot to add these pics ages ago! i sprayed the boys faces, bit of a tan. unfortunately when i put them in my storage box the nose was to close to the lid and left a flat area on the end of the nose. so they will need to be sanded and resprayed.


on a happier note, the trees, i think, look great, exactly what i wanted.


new armature

i have started work on the new armature, its taken a bit longer than the other one because i had to get used to making everything a bit smaller. 
originally this armature was going to be the girl (Charlotte) but after doing some work on the story and character development i decided i wanted the girl to be moody and older than the boy, so she needed to be taller to fit with her age. 
because the original armature is fairly big i didnt want to make another armature that is bigger, so i have made one that is smaller. 

my idea now was to make the new armature the boy and use the original armature as the girl. as i have been thinking about it, I'm not sure this will work. as the images show, the new armature is quite a bit smaller so, will the boys head look too big on the new armature? also will the armature be able to perform under the weight of the oversized head? i have already made the head and faces for the boy so i dont want to remake any of those.
because of these things i think the easiest thing to do and the cheapest thing, is to change the story.
so, the plan is to finish this armature and see if the head looks stupid on it and if it can even handle the weight of the head, if it can't, this armature will become the girl and a few changes will happen to her character and personality.


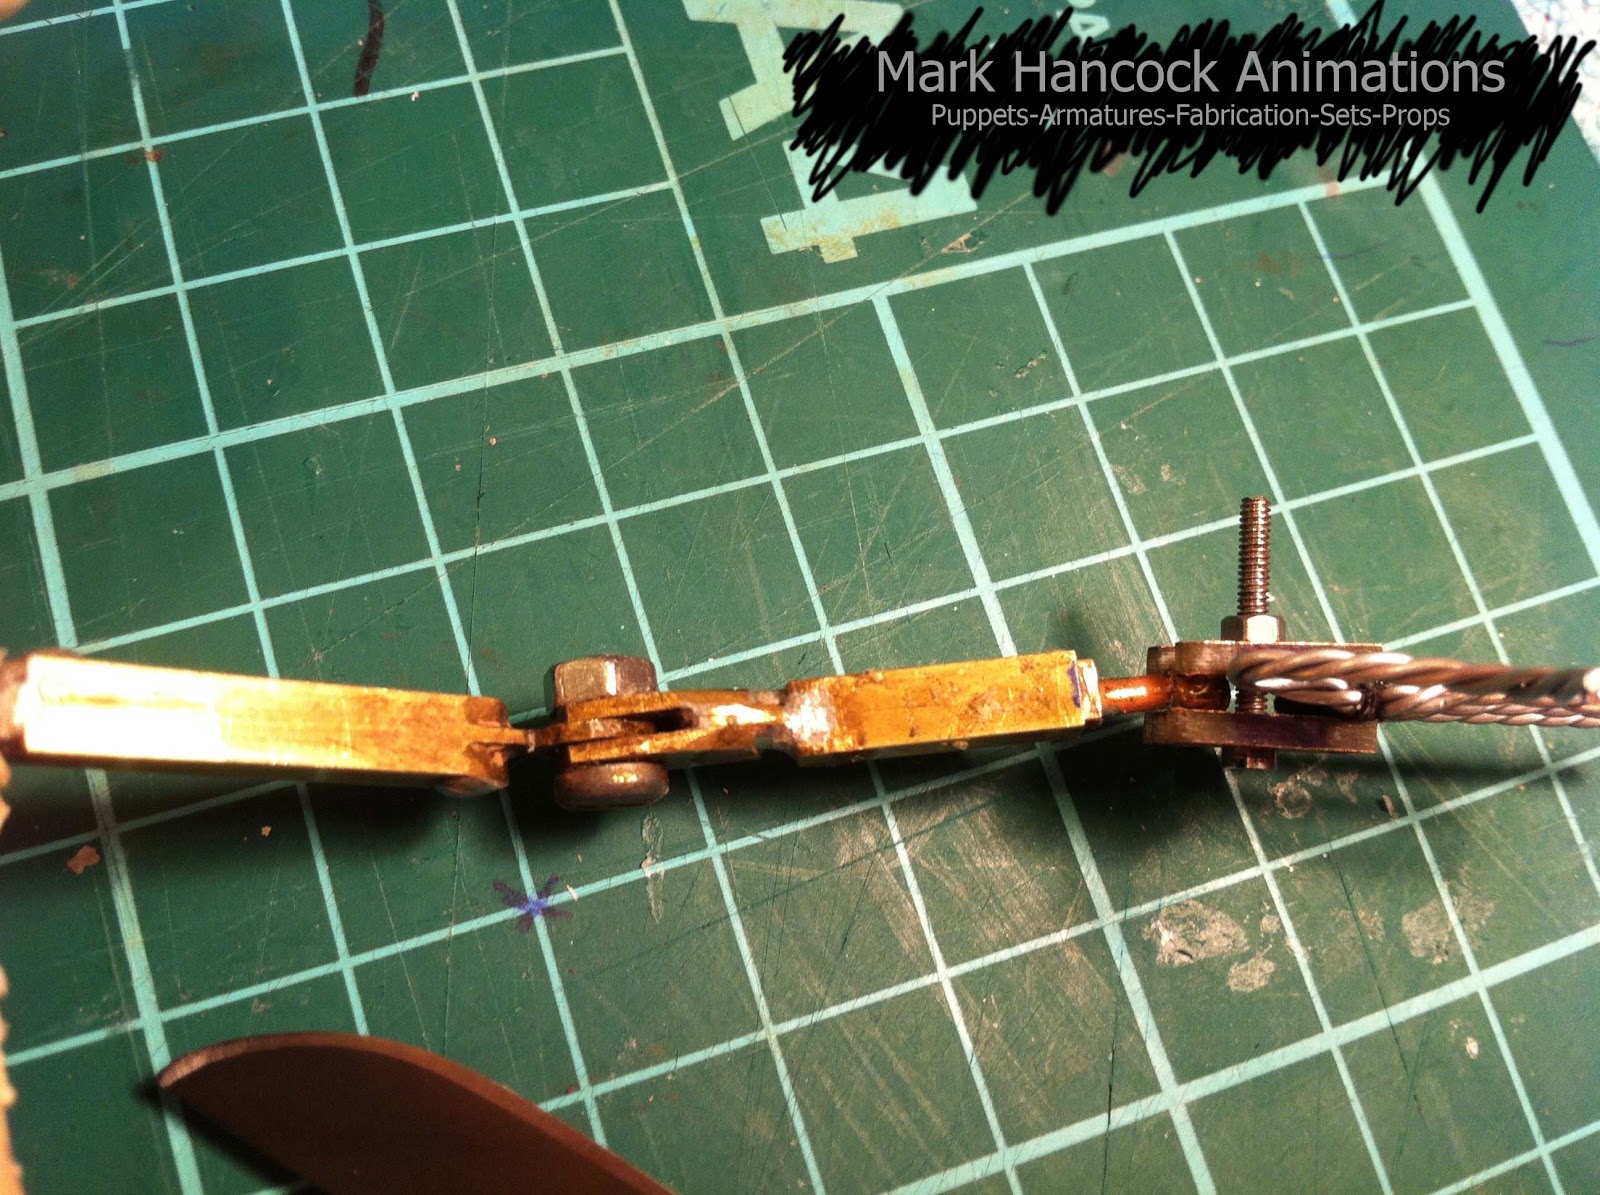
with this armature i have decided to not use the surgical steel threaded balls in stead i have bought some brass bead spacers, basically brass balls drilled all the way through. they are 4mm and because they are brass, so much easier to solder to the brass bar. 
it is a bit tricksy to drill the holes because you cant apply to much pressure with the vice because they are quite soft, but i think they work fine and its a lot quicker. 
because of their size its allowing me to make everything a lot slimmer and smaller but still has a lot of strength. 

bellow, the armature in process and a picture of the original boy puppet alongside the new armature to show sizes. the original puppet is measured at 9inches.


also, my liquid plastic arrived late today. because its cold weather i have left it indoors to warm up and tomorrow i will start the day by finishing off my mould cast. very exciting. i hope it works, the sculpt has been sat in 3/4 of a finished mould for about 2-3 weeks, will the release agent still be active? i bloody hope so!
ill keep you posted. 

wow this is probably my longest post, thats what Thatchers Gold cider does.